2022. 2. 21. 11:17ㆍSpring Boot
이전 Gmail Server 연동으로 메일 발송 기능을 구현해보았다.
(해당 기능에 대해 알고싶다면 이곳 클릭..)
이번에는 유저들에게 특정 알림을 보내주는 슬랙봇을 만들어보자!
Slack Bot 생성
먼저 Slack Bot 생성과 필요한 권한을 부여해보자.
https://api.slack.com/apps/ 해당 링크로 들어가면 바로 생성 가능하다.

workspace가 없다면 미리 만들어둬야 한다.

슬랙봇을 선택한 후

Slack Bot서비스를 사용하기 위해선 Token을 부여받아 API 서버에 요청해야 한다.
토큰은 일종의 입장권 개념이라고 생각하면 된다.
해당 토큰에는 다양한 기능이 추가될 수 있다. (해당 workspace 이용자 정보 접근, 이용자에게 메세지 보내기 등..)
Slack에서는 이러한 기능의 범위를 설정해주는 작업을 먼저 진행하라고 친절히 안내해준다.

필자가 추가한 기능은 이정도다. 더 많은 권한을 알고 싶다면 이곳을 참고해보도록 하자.
- chat:write : 사용자에게 DM 보내기
- files:write : 사용자에게 파일 보내기
- users:read & users:read.email : 사용자 이메일을 통해 member 고유 ID 가져오기
특히 users 관련 권한들은 개인 DM을 가져오기 위해선 꼭 필요하니 잊지 말고 넣어두자.
(슬랙 이메일이 아니라 멤버들이 고유로 가지고있는 ID를 통해 개인메세지를 보낼 수 있기 때문)

그 후 Install to Workspace를 통해 생성 완료!
만약 본인이 속한 WorkSpace의 관리자가 본인이 아니라면, 바로 APP을 install 할 수 없고, 관리자에게 요청을 보내야 할 수도 있다. 만약 중간에 권한을 새로 추가하거나 변경할 경우, 다시 재심사를 받아야 하기 때문에 필자처럼 workspace를 로컬에 따로 만들어 미리 실험해보는걸 추천한다!

자 이제 SlackBot을 이용할 수 있는 토큰이 생겼다!
이 토큰과 함께 SpringBoot로 돌아가 신나게 코드를 작성해보자.
Slack Bot 코드 구현 - Service

application.properties 파일에 방금 생성된 토큰값을 설정해주자.

먼저 Service를 만들어보자.
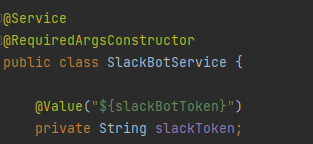
상단에 @Value를 통해 토큰 값을 미리 설정해둔다.
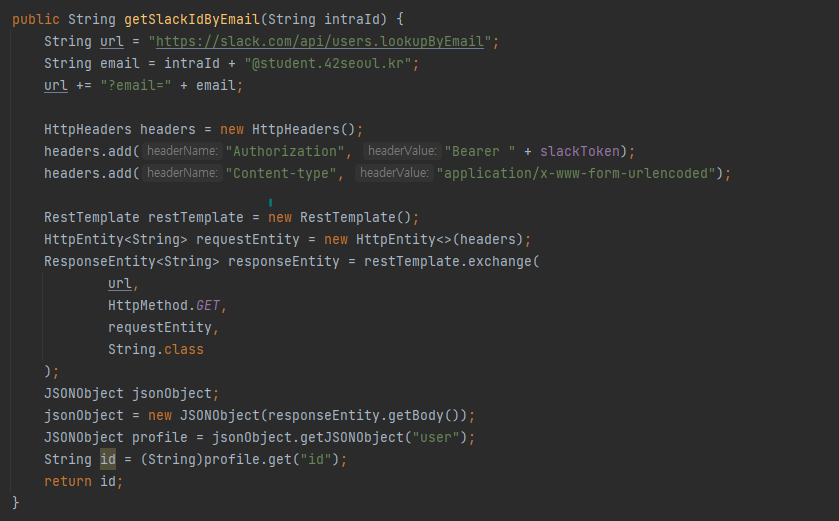
먼저, 개인 DM을 보내기 위에선 먼저 설명했듯이 slack 고유 멤버ID를 알고 있어야 보낼 수 있다. 필자가 만드려는 웹서비스는 email정보를 알 수 있기 때문에 Scope 설정해서 추가한 users:read.email 권한을 통해 ID를 가져올 것이다.

해당 URL로 Slack서버에 토큰과 함께 필요한 정보를 넘기면, body에 user에 대한 정보를 얻어올 수 있다.
헤더에 Authorization 값에 "Bearer " + 부여받은 토큰 값을 넣어 보내줘야 한다.
물론 URL 파라미터값에 email="이메일값"을 붙여 넣어줘야함을 잊지말자.
참고로 JSONObject는 라이브러리를 다운받았다.
데이터를 json화 시키거나 json화된 데이터를 String으로 변경하여 추출하기 편하다.
implementation 'org.json:json:20190722'

멤버 ID를 얻었으니 이제 해당 유저에게 메세지를 보내는 메소드를 작성해보자!
필자가 설정한 chat:write 권한은 chat.postMessage 메서드를 사용할 수 있다.
https://api.slack.com/methods/chat.postMessage 해당 링크를 통해 보내는 양식을 자세히 알 수 있다.
약식으로 설명하자면 token + channel + text로 이루어져 있는데,
해당 channel에 채널명이 아닌 멤버ID를 넣으면 DM으로 전송할 수 있다.
text는 보낼 메세지 내용이다.
SERVICE 전체 코드
@Service
@RequiredArgsConstructor
public class SlackBotService {

    @Value("${slackBotToken}")
    private String slackToken;

    public void sendPhotoToUser(String intraId) {
        String url = "https://slack.com/api/chat.postMessage";
        String img = "https://profile.intra.42.fr/users/jimkwon/photo";

        HttpHeaders headers = new HttpHeaders();
        headers.add("Authorization", "Bearer " + slackToken);
        headers.add("Content-type", "application/json; charset=utf-8");

        String slackId = getSlackIdByEmail(intraId);
        JSONObject jsonObject = new JSONObject();
        JSONArray arr =new JSONArray();
        jsonObject.put("channel", slackId);
        JSONObject attachments = new JSONObject();
        attachments.put("image_url", "https://is5-ssl.mzstatic.com/image/thumb/Purple3/v4/d3/72/5c/d3725c8f-c642-5d69-1904-aa36e4297885/source/256x256bb.jpg");
        attachments.put("text", "HELLO");
        attachments.put("pre-text", "HELLO");
        arr.put(attachments);
        jsonObject.put("attachments", arr);

        String body = jsonObject.toString();
        HttpEntity<String> requestEntity = new HttpEntity<>(body, headers);
        RestTemplate restTemplate = new RestTemplate();

        ResponseEntity<String> responseEntity = restTemplate.exchange(url, HttpMethod.POST, requestEntity, String.class);

        HttpStatus httpStatus = responseEntity.getStatusCode();
        int status = httpStatus.value();
        String response = responseEntity.getBody();

    }

    public void sendMessageToUser(String intraId) {
        String url = "https://slack.com/api/chat.postMessage";

        HttpHeaders headers = new HttpHeaders();
        headers.add("Authorization", "Bearer " + slackToken);
        headers.add("Content-type", "application/json; charset=utf-8");

        String slackId = getSlackIdByEmail(intraId);
        JSONObject jsonObject = new JSONObject();
        jsonObject.put("channel", slackId);
        jsonObject.put("text", intraId + " 님, 반갑습니다!");
        String body = jsonObject.toString();

        HttpEntity<String> requestEntity = new HttpEntity<>(body, headers);
        RestTemplate restTemplate = new RestTemplate();

        ResponseEntity<String> responseEntity = restTemplate.exchange(url, HttpMethod.POST, requestEntity, String.class);

        HttpStatus httpStatus = responseEntity.getStatusCode();
        int status = httpStatus.value();
        String response = responseEntity.getBody();

    }

    public String getSlackIdByEmail(String intraId) {
        String url = "https://slack.com/api/users.lookupByEmail";
        String email = intraId + "@student.42seoul.kr";
        url += "?email=" + email;

        HttpHeaders headers = new HttpHeaders();
        headers.add("Authorization", "Bearer " + slackToken);
        headers.add("Content-type", "application/x-www-form-urlencoded");

        RestTemplate restTemplate = new RestTemplate();
        HttpEntity<String> requestEntity = new HttpEntity<>(headers);
        ResponseEntity<String> responseEntity = restTemplate.exchange(
                url,
                HttpMethod.GET,
                requestEntity,
                String.class
        );
        JSONObject jsonObject;
        jsonObject = new JSONObject(responseEntity.getBody());
        JSONObject profile = jsonObject.getJSONObject("user");
        String id = (String)profile.get("id");
        return id;
    }
}
Slack Bot 코드 구현 - Controller & View
Service 외에 구현에 필요한 Controller와 View를 마저 작성해보자.
@Controller
@AllArgsConstructor
public class SlackController {
    private final SlackBotService slackBotService;

    @GetMapping("/dm/send")
    public String main() {
        return "SendDm.html";
    }

    @PostMapping("/dm/send")
    public String sendMail(String intraId) {
        slackBotService.sendPhotoToUser(intraId);
        slackBotService.sendMessageToUser(intraId);
        System.out.println("DM 전송 완료");
        return "AfterMail.html";
    }
}
컨트롤러
<!DOCTYPE html>
<html lang="en">
<head>
    <meta charset="UTF-8">
    <title>sendDm</title>
</head>
<body>
<h1>Slack DM 보내기</h1>

<form th:action="@{/dm/send}" method="post">
    <table>
        <tr>
            <td>DM보낼 슬랙 아이디를 입력하세용</td>
            <td>
                <textarea name="intraId" placeholder="intraID 입력하세요"> </textarea>
            </td>
        </tr>
    </table>
    <button>발송</button>
</form>

</body>
</html>
뷰 화면
Slack Bot 실행 결과
코드를 다 작성했다면 잘 돌아가는지 확인해보자!

슬랙 아이디를 입력받으면

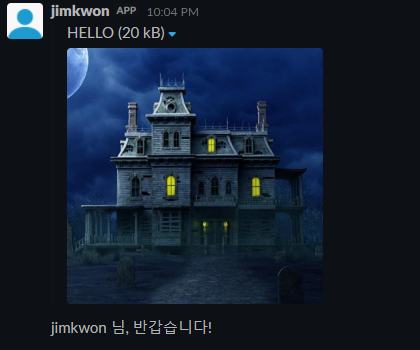
개인 DM으로 메세지가 도착한 것을 확인할 수 있다!
만약 Text 이외에 image를 담아 보내고 싶다면? attachments키를 만들어 image_url을 넣어주면 된다. 이 때는 파일명이 아닌 url로만 가능하다.

위와 같이 attachments를 JSONArray로 추가하여 넣어주면

이미지와 함께 넘어오는 것을 확인할 수 있다.
이 외에도 메세지를 보낼 때 다양한 레이아웃을 사용할 수 있다.
https://api.slack.com/messaging/composing/layouts 해당 사이트를 참고해보자.
'Spring Boot' 카테고리의 다른 글
| [Spring Boot] 이메일 보내기 (2) - 참조(cc), 첨부 파일 (8) | 2022.08.10 |
|---|---|
| [Spring Boot] SMS 전송 - NAVER SMS API 연동 (17) | 2022.08.10 |
| [Spring Boot] File Upload & Download (2) - ORACLE DB 연동 (0) | 2022.08.05 |
| [Spring Boot] File Upload & Download (1) (2) | 2022.08.05 |
| [Spring Boot] EMail 보내기 (4) | 2022.02.16 |